Want to quickly learn how to make API calls to your Shopify Store? It's actually super easy!


We'll walk you through everything you need to start right away.


Start Now for Free!


We are going to use a very cool http client called Paw

Click below to download Paw now!

After installing Paw, you will want to make sure you have your API credentials from your Shopify store.

Click to login to your Shopify account


Can't See? Zoom in!

1. Then go to Apps

2. Then Private Apps

3. Create a new private app

4. And call it whatever you'd like!

Great, now that you have your API credentials, lets pop them into PAW

But before we can do that, we have to make sure that the API endpoint we are hitting is setup with the right permissions.


  • Let's go down to where it says Products, Variants and collections and turn change that from "Read Access" to "Read and Write Access"

  • Let's also go ahead and do the same thing for Orders, transactions and fulfillments


  • Great! Now lets grab them and put them into Paw.

Awesome! Now lets add the settings in Paw


  • You will see that the Paw UI has four settings on the main page: Headers, URL Params, Body and Options. For this tutorial, we will start with Header, which should be already selected.

  • Under Header Name, we will put the word 'Authorization' and the value will be 'Http Basic Auth'

  • Then underneath, we will put the name 'Accept' with the value 'application/json'. Under that we will put the name 'Content-Type' and toss in the 'application/json' value again.

Great, let's add our store's credentials to HTTP Basic Auth Header Value


  • Go ahead and click on the HTTP Basic Auth value that you set.

  • A modal will popup with a username and password.

  • You'll want to grab you're credentials from the private app you created and pop them in. If you get stuck, check out the video.

You're Amazing! Ready to make your first API call?

When using the Shopify API, generally you will be using four methods


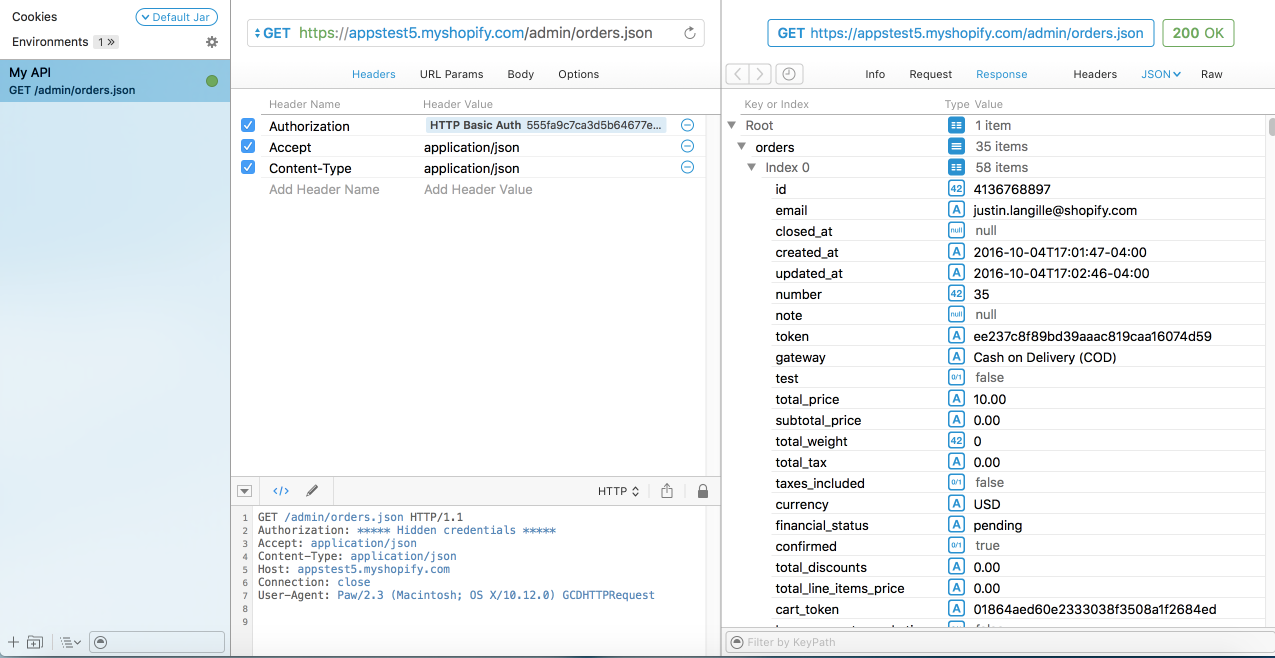
GET - Use this to grab info from your store using the API.

POST - This will be to push info to your store using the API.

PUT - Used for editing data.

DELETE - Exactly what it sounds like.

Sweet! Let's make an API call

We are going to make a simple call that will grab all products in your store and return back the orders and all of their properties.

  1. Grab your store name (with the https:// infront of it)

  2. Pop it into the top field where it says 'Get'

  3. We are then going to add a slash to the end of the URL and add: admin/orders.json. In the end, the URL should look something like this - https://yourstore.myshopify.com/admin/orders.json

  4. Hit Enter!

Fantastic! If you got a repsonse of 200, you're good to go!


Now take your time going through the righthand side of the screen to go through the properties of the orders you pulled


Great, now that we were able to grab information, lets try pushing some to our store

We are going to use the POST method to push data to our store using this endpoint: /admin/products.json


  • Go ahead and copy and paste that enpoint into the URL field and make sure it is at the end of your store name.

  • Then change the method to POST instead of GET


  • You will then see one of the options below called "body".

  • Let's click on that and grab some info to create a product on our store

  • Go ahead and grab some dummy data from our API reference here.

  • Then copy that data and paste it into the body field.

Amazing!

If all went well and we received a 201 response, you will have a new product on your store.


That wasn't so hard was it?


For this tutorial we used Paw, but there are a bunch of other clients you can use like Postman.

Whatever works best for you and your workflow.

There are lots of other cool things you can do with the Shopify API. To learn more, check out our docs here.